Free Estimate
888-698-1958
Call for Priority Scheduling
888-698-1958
Call for Priority Scheduling
Book Online
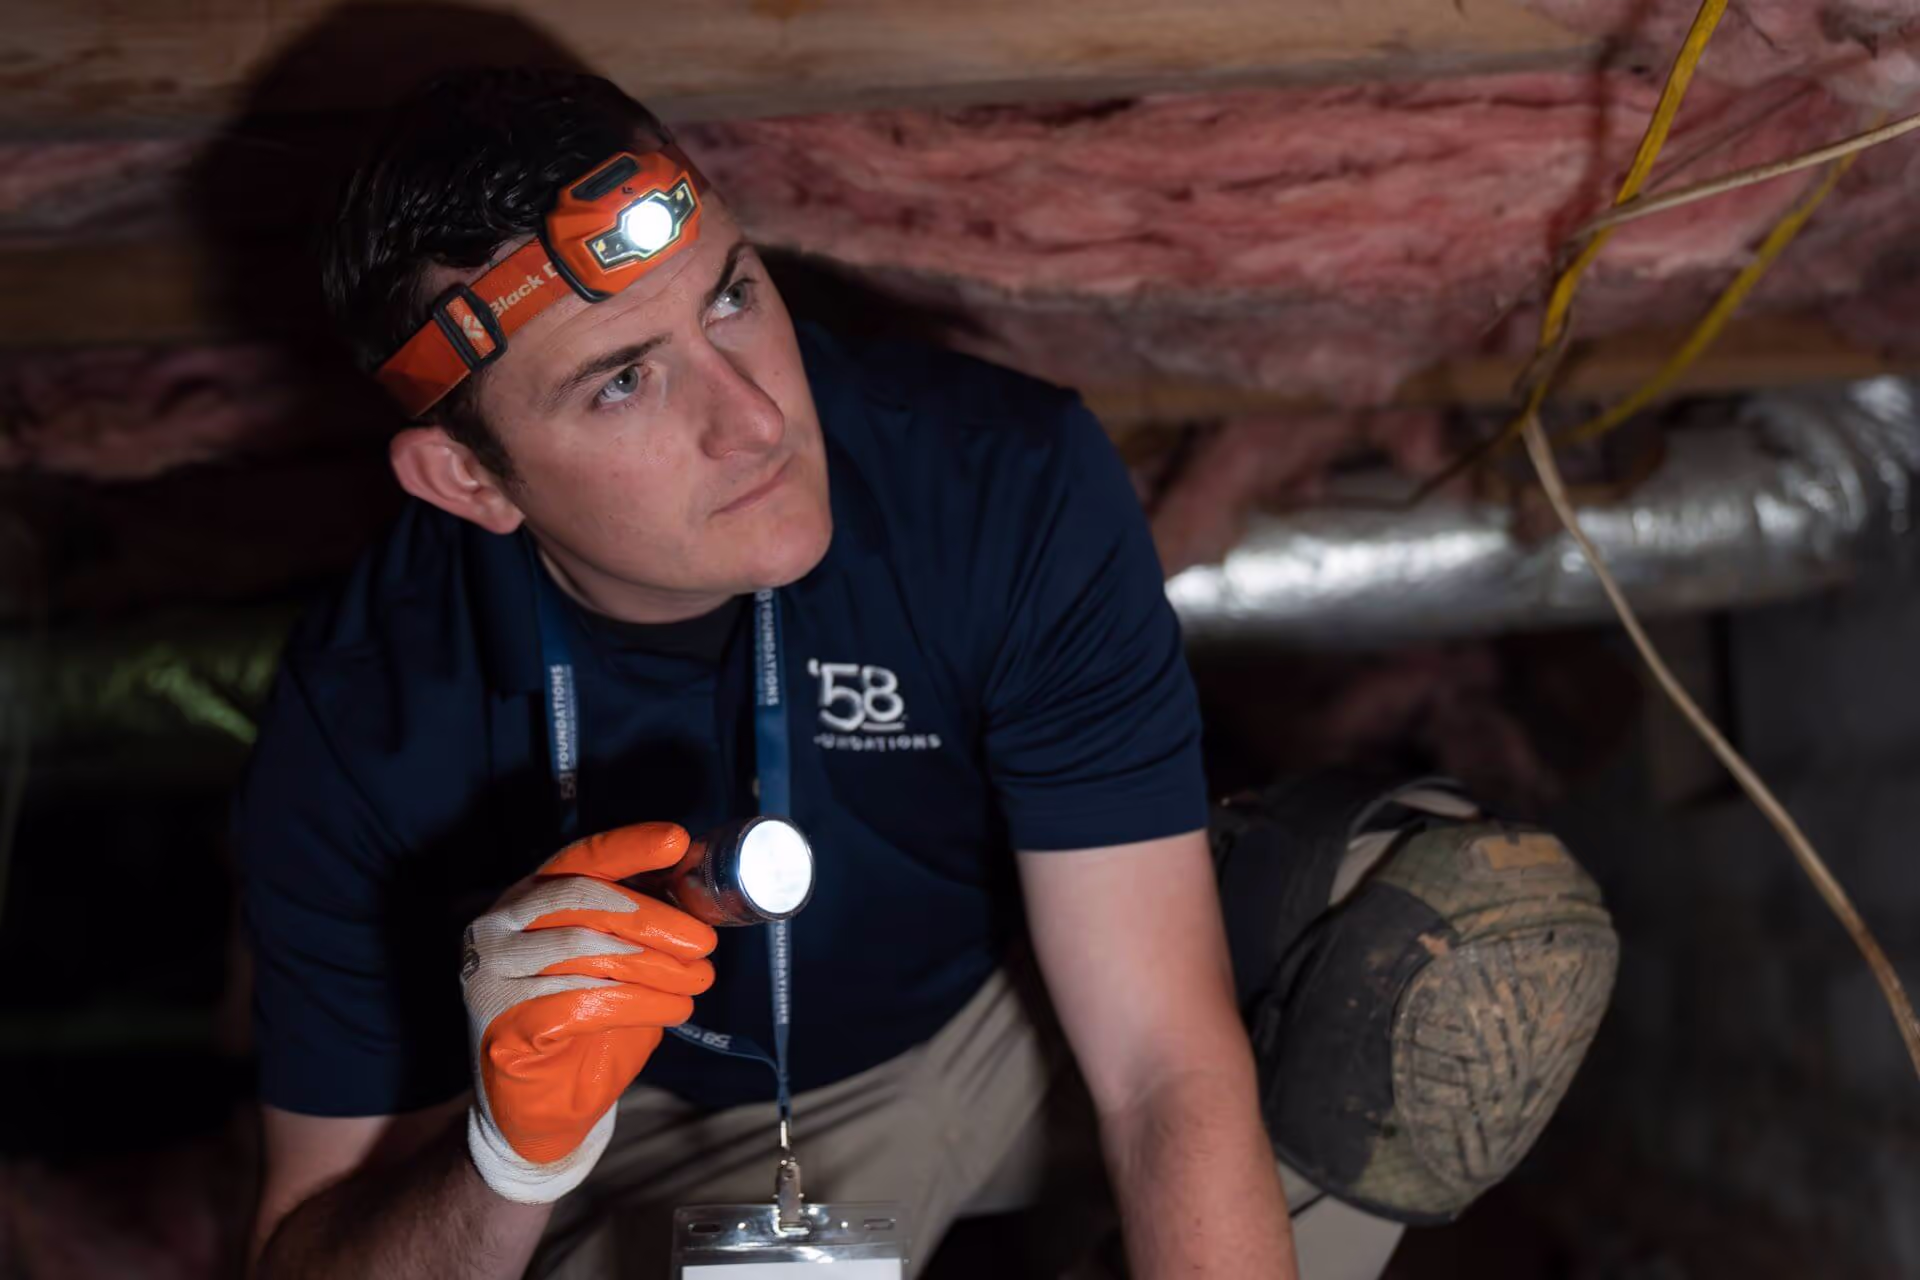
Is it that you haven’t looked inside your home’s crawl space in a while? If so, it might be time to give it a thorough inspection. Especially if your floors are feeling cold even when your furnace is running! While your crawl space isn’t the most inviting place to visit, spotting damp, soggy fiberglass batts hanging from your floor joists (or no insulation at all) is a telltale sign that your crawl space needs to be addressed to ensure adequate insulation and minimal moisture.
This guide will walk you through the best steps to take when re-configuring your crawl space. Also, we will discuss the downfall of traditional crawl space insulation methods, along with the more modern and efficient crawl space encapsulation processes. Let's look at how you can apply them to your home.
For many homes with crawl spaces, it is common for builders to place fiberglass insulation in the subfloor above the crawl space while leaving wall vents open. The thought behind this is that any moisture build-up in the crawl space would be expelled out of the vents.
Unfortunately, this old-school design does not live up to its intended purpose. Homes draw in air from all sides at the lower levels. This air then travels upward into the home and out through the attic or roof. Outside air is sucked through vents and small gaps and into the crawl space. If this air has higher levels of humidity in it, and comes into contact with the cool surfaces in the crawl space, it creates condensation. Condensation can lead to insulation degradation, wood rot, mold growth, and energy inefficiency.
Rather than taking the traditional approach to crawl space insulation, the most effective way to ensure your crawl space stays condensation-free and insulated all year long is to enclose it entirely. This should be done regardless of the climate you live in. Not only does crawl space encapsulation reduce the chance of moisture build-up and promote better energy efficiency, it also provides a complete solution for crawl space mold and pest prevention. Moreover, it creates an overall cleaner crawl space in your home that you could use for additional storage.
Below, we’ve detailed four steps you can take to encapsulate your home’s crawl space.
One of the best ways to insulate a crawl space is to encapsulate it along with insulation. Encapsulation eliminates outside air and moisture from entering the crawl space as humidity.
If your crawl space has standing water, an interior drain system with a sump pump and an industrial-strength dehumidifier might be necessary to completely dry out the space before the encapsulation process can begin.
Once you have eliminated potential water sources and completely dried out your crawl space, the next step in the encapsulation process is to seal crawl space vents, airways, or access doors. Many manufactured crawl space vent covers help to create an airtight bond—but if you happen to create your own DIY vent covers, be sure to use non-organic materials and caulk them in place to keep moisture out.
Then, using a foam sealant, seal off any gaps, airways, or cracks—including between plumbing, drain line, or wiring routes—that remain in your crawl space. For access doors, be sure to install heavy-duty weatherstripping around their frames to keep air from flowing into your crawl space.
Rather than installing batts between your subfloor’s joists (paper-backed batt insulation in a crawl space with high humidity can become food for mold, especially if it is hanging), the encapsulation process utilizes rolled foam insulation across your crawl space’s walls. Unlike fiberglass batts, these types of insulation resist damage caused by moisture, and deliver more thermal resistance than many other insulating materials of the same thickness.
Be sure to select insulation with the appropriate R-value (the measurement used to determine thermal resistance) for your area and climate. Before applying your insulation, read through any manufacturer specifications or installation guides, as each type of insulation features its own installation process.
With your insulation in place, it’s time to add a vapor barrier over the floor and walls of your crawl space. This prevents moisture from entering up from the floor or through porous concrete walls as moisture vapor. Removing moisture makes your crawl space healthier and more energy efficient. This now dry, clean, and usable space, has the potential to become an additional storage area in your home.
Vapor barriers are available in a wide range of thicknesses. However, you need to be sure to choose one that will, at minimum, withstand rips and tears—especially if your HVAC, ducting, or other appliances are housed in your crawl space. UV protection is also extremely important so the plastic liner doesn't become brittle and fall apart. Many lower end, thinner vapor barriers do not have UV protection.
Encapsulating your crawl space on your own can be a time-consuming and challenging process, especially if you’re also dealing with moisture or mold problems. Fortunately, at ‘58 Foundations & Waterproofing, we can help you solve your crawl space issues for good.
If you’re dealing with severe moisture issues or standing water in your crawl space, our basement waterproofing solution—which includes encapsulation, dehumidifier, and sump pump options—will work to keep your crawl space dry and free of mold. Additionally, our heavy-duty commercial crawl space dehumidifier will work to dry out any moisture collected in your joists, subflooring, posts, and other porous materials, stopping further rot and mold growth.
If you’re looking to install a permanent crawl space solution, call ‘58 Foundations & Waterproofing today to schedule your free inspection.
So, you’ve decided to have your basement waterproofed and equipped to keep water out and away from your home. But along with having drainage channels in place to guide water to a collection site, now you’ll need to install a sump pump to get that collected water moving out and off your premises. Let’s take a dive into how to prepare for and how to install a sump pump in your basement!
To prepare yourself, make sure you have the following tools to complete the job: an electric drill, a hammer, a pipe cutter, and drill bits. You may also want to have a sledgehammer on hand, just in case. Then will come the need for materials. You’ll need the following materials to ensure that your sump pump is properly placed and installed…
Now that you’re properly equipped and have the right supplies, let’s get to putting together your sump pump!
Your sump pump will need to be powered, and so should be located near a GFCI (Ground Fault Interrupter Outlet). But if you can’t find a suitable place that’s near an outlet, consult with a certified electrician to have an outlet installed. Once that’s been taken care of, you now have the general site for your sump pump.
Next, you’ll want to dig out your sump pit. This is where water will be collecting, and the sump pump will begin moving that water out. Based on the measurements of your sump pump, dig a hole that is six inches deeper and 10 inches wider than the sump pump.
Add around 2 to 3 inches of gravel to the bottom of the sump pit you’ve made before topping it with a fieldstone to provide a stable platform for the sump pump to sit. Alternatively, you could fill in more gravel until it leaves one or two inches of the sump pump exposed. One way or another, this will ensure that your sump pump remains stable.
You’ll now need to attach the male adapter to the PVC discharge pipe before fitting it into the female adapter of the sump pump. You’ll want to make a hole about six inches above the pump in the discharge pipe, using a ¼ inch drill—this is to create a weep hole, so that water can flow back into the pump when it turns off. This will keep it primed and ready for operation.
With the wire ties, attach the sump pump’s electrical cord to the discharge pipe. On the open end of the discharge pipe, install your check valve. Make sure the sump pump, the discharge pipe, and the check valve are all installed and secure before moving onto the next step.
With the pressurized fittings you have and PVC pipes, set up your channels so that they will guide the water to the exit point out of your home. Use the J Hooks to help support the PVC pipes and hold them up.
Now is time to make a hole in the wall for your PVC pipe to go out of the house. This is where a hammer may be necessary. Make sure the pipe continues going at least four feet away from the house.
Once you have the PVC pipe going through the hole in the wall, use silicone sealant to seal the hole around the pipe. This will secure the pipe and keep your lower level safe from outside air and debris coming in.
At the end of the PVC pipe, attach an increaser to spread out the water flow. Then, attach a corrugated pipe to the end of the PVC pipe to further guide the water out and disperse it away from your home. Be sure to add gravel around the corrugated pipe to keep it stable and in place.
It’s time to plug in your sump pump and place a cover over your sump pit. Now you have a presentable and fully functioning sump pump that’s ready to keep that groundwater out of your lower level and safely away from your home!
Now that you know how to install a sump pump system, if you would prefer to have an expert help, you can always count on the experienced professionals at ’58 Foundations & Waterproofing! Most waterproofing solutions aren’t designed to last for a very long time. But with over 64 years of experience, ’58 Foundations & Waterproofing can provide the waterproofing solution your basement or crawlspace needs—one that’ll work effectively and last for years on end! From our Channel ’58 drainage channels to our Workhorse sump pumps with battery backup options, you can rest assured that ’58 has the guaranteed results you need to regain the peace of mind that you deserve. You can enjoy your basement or crawlspace without the worry of when there’s a heavy rain coming through
Along with basement and crawlspace waterproofing, ’58 Foundations & Waterproofing also offers its expertise in foundation repair, crawlspace encapsulation, and mold removal. No matter how water and moisture is affecting your foundation and lower level, we can help you find a comprehensive solution to your problem.
We have local offices all throughout the Eastern Seaboard! Whether you live near Marietta, GA, Chattanooga, TN, Winston-Salem, NC, or Baltimore, MD, there’s a ’58 team of experts to help you!
Give us a call today to schedule for a free sump pump inspection and a detailed estimate!
It’s something homeowners never want to see in their house. Along with being a dreadful sight, black mold can also be a health hazard to you and anyone else in your household. Mold spores can trigger reactions for those with mold allergies. Meanwhile, mold can even cause sickness in those with weakened immune systems. It is these potential dangers of black mold that make it critical to get rid of black mold in your basement whenever it shows up. More importantly is taking action to prevent it from growing in the first place.
Homes across the nation have problems with mold. That’s because mold can be found virtually everywhere. But where black mold really likes to grow is somewhere dark as well as damp—such as your basement. What ought to be a nice additional space for storage or an extra living space can be quickly turned into a danger zone if mold growth is left unchecked. It only takes a little bit of persistent moisture to give the mold spores in your house a chance to take root and grow.
Should you find black mold in your basement, there are ways to get rid of it and prevent it from coming back! Let’s take a dive into how black mold appears in your basement and how to get rid of these mold problems.
Mold is a natural part of our environment’s process of breaking down organic matter. Where there’s persistent moisture, mold will try to grow and spread, all the while breaking down the thing they’re growing on. In nature, this typically happens on organic debris such as wood, all as part of the natural cycle of life. Where mold grows, there are mold spores, and there are all sorts of molds out there in the world. No matter where you go, chances are there are mold spores—but without that key moisture, mold can’t grow.
But mold doesn’t know the difference between a fallen tree trunk in the middle of the woods and the damp space of a basement. Whether there’s water leaking in through a basement wall crack or droplets are condensing on the pipes in your basement somewhere, that moisture will encourage mold to begin the process of colonizing and growth.
The short answer is yes, there are kits out there that can be used to collect a mold sample and have it tested at a lab. But whatever kind of mold it may be, it should be removed as soon as possible to avoid both damage to your basement as well as to prevent potential health hazards from arising. No mold should be left alone to grow within your basement, or any other part of your home.
There are various molds that can appear in your basement, and a good number of them can appear as black mold, though they may come in different colors as well. Let’s take a look at the five most common types…
Also called toxic black mold. This mold is the main concern when black mold is ever brought up. It’s also one of the most common molds to appear in basements and tends to grow very fast, so getting rid of it as fast as possible is a priority. Toxic black mold loves to grow on drywall, wallpaper, wood, and gypsum board. This black mold can cause a variety of symptoms such as coughing, sneezing, headaches, rashes, fatigue, and it can trigger allergic reactions and other asthma symptoms.
Another mold that can appear black in appearance, Alternaria also appears in a brown or olive color. This mold can potentially cause serious infections in individuals, though it is rare. All the same, it should be removed quickly as it is very fast growing.
Aspergillus has a more yellowish appearance, but earns a place on this list for how common it is. It is considered to be low risk but should be removed all the same. It can affect those with asthma. For those with weakened immune systems, it has been known to cause illnesses collectively known as Aspergillosis.
While typically brown, this mold can also have a gray or a black appearance. This is one of the more slow-growing types. Cladosporium can cause allergic reactions and agitate those with asthma.
Popularly known for being used in the creation of the antibiotic penicillin, Penicillium tends to appear white or green. As a mold in your basement, it can trigger allergic reactions and possibly infections, especially for those with compromised immune systems.
If you’re determined to try getting rid of the mold yourself, there are several steps you’ll need to take to try controlling the presence of mold.
While trying to put a stop to mold in your basement, it is important to wear protective gear such as a face mask, gloves, and disposable cleaning tools like sponges. If you have a dehumidifier, be sure to run it and remove as much moisture as possible from the basement. But if you don’t feel confident about trying to take on the mold yourself, call for a professional mold expert. They will have the knowledge and mold removal solutions to help ensure that the job gets done right.
Moisture is the key to what allows mold to grow. If you can prevent moisture problems and groundwater intrusion into your basement, you can help protect your basement from mold infestations. Here are some measures you can take to keep your basement dry and safe from mold…
For over 64 years, ’58 Foundations & Waterproofing has been in the business of keeping basements and crawl spaces dry with effective and long-lasting solutions! Damp basements are the perfect place for black mold to grow. But with our wet basement repair expertise and our mold removal services, we’ll clear your basement of that nasty black mold, and make your basement a safe and dry place once again. We’re proud to be an exclusive DOT ambassador, utilizing a mold removal solution that offers great results with less chemical burden. Our mold solution not only removes mold, but it can even help revitalize the surfaces of affected wooden structures.
Give us a call today to schedule for a free mold inspection and receive a detailed estimate. With our quality products and mold removal professionals, you can count on us to make your basement mold-free!
Wet-dry vacuuming is just one step in the process of saving your basement carpet from water
A flooded basement can be extremely overwhelming. Your first thoughts are to rescue your belongings and goods, and save the basement carpet before mold starts to grow. Flooded basements can occur from a broken sump pump, leaky plumbing, floodwater over saturating the ground around your foundation, or seepage through the cracks in your foundation floor or walls. It is important to stop the source of water if possible. Next, follow the steps below:
When your basement floods you will most likely have standing water to remove this you will need to use a wet-dry vacuum or a pump to remove as much water as you can before getting to the carpet. It is important to remove as much water as possible in this fashion first. The longer the water is allowed to sit, the more water damage may be done to your basement and any items within. Run the vacuum slowly over the entire flooded space, including the carpet, to extract all the water possible. Once the vacuum stops pulling up water, move on to the next step.
First, you’ll want to remove any water-damaged furniture, boxes, or other items from the basement. This is because mold grows on organic materials like paper, wood, leather, and fabric made from natural fibers. Next, use fans and dehumidifiers to circulate fresh air through the space. If the weather permits, open windows and doors. However, if it is too humid, run the air conditioner to minimize moisture in the air.
When the previous two steps are complete, remove the carpet from the tack strip and discard the wet padding. Use chairs or ladders to “tent” the carpet. This will allow air to circulate and fully dry the sub floor.
For the final step, it is imperative that you know the basement and your carpets are fully dry. If possible, conduct moisture tests to find any hidden pockets of water. Any moisture that is trapped in the carpet is a risk for mold and mildew growth. Mold in the basement carpet will not only give your basement a musty smell, but their spores can trigger allergy and asthma symptoms.
Some suggest finding a professional to steam clean and deodorize the carpets. Give the carpets a chance to dry for 24 hours. Once the carpets are 100% dry they can be reinstalled.
A flooded basement is a headache for any homeowner. Basement flooding can come from floor or wall cracks, or an inadequate sump pump. Once moisture enters your basement it creates a perfect condition for mold to grow. If your basement leak is untreated it is bound to happen again. With a ’58 Foundations & Waterproofing basement waterproofing system, your basement can be made safe and dry again. Whether you use your basement for storage or you want to turn it into a finished space, our interior basement waterproofing solution will make it possible.
If you’d like a free inspection of your foundation cracks or sump pump, contact ‘58 Foundations & Waterproofing for a free basement waterproofing estimate.
Unfortunately, flooded basements happen. Whether it’s from living in an area with heavy rains or because of ruptured plumbing, there’s a chance that your basement can turn into a miniature pool. When flooding occurs in your basement, you will be faced with various potential dangers. Which is why it is important to have a flooded basement cleaned as soon as possible. But whether you’ve experienced a flooded basement, or you’re looking to learn more so that you can prepare, we’re here to help you figure out what to do next.
First thing’s first, stay out of the water as much as you can. In the case that sewage has been brought up through your floor drains during the flooding, the water can be full of harmful bacteria. Also, if you have any electrical equipment in your basement, it could make the risk of electrocution all the greater. Instead of trying to wade into the water or risk falling in, it’s time to make some calls to begin the wet basement repair process.
If you have electrical equipment in the basement, call for the electrician. They will turn your power off for you. Once the risk of electrocution has been removed from the equation, it’s time to call in the professionals to deal with the water.
Depending on the source of your flooded basement problem, that will help you figure out who to call next. If you have a ruptured pipe, water tank, or waste line, calling for a plumber will be your next step. Or if it’s because of a septic tank backup or because your sewer line has become clogged and backed up, you may want to call for a septic specialist. Also, you might want to speak with your local sewage department to see if the sewer clog is somewhere in your neighborhood (it may even be affecting your neighbors too).
If your flooded basement is because of foundation problems, then you may need to contact a foundation repair expert. They can inspect your basement and design a solution. These solutions may involve sealing cracks or cleaning out the French drains in the basement. With the right foundation or basement repair expert, you can account for all possible sources of leaks. If you have a preexisting drainage system that’s failing, they’ll know how to clean or replace the French drains in your basement.
But now that you know who to call, you may be wondering: how much does it cost?
The total cost for your basement cleanup depends on how much water has entered your basement. Another factor is how quick the water gets removed. The longer water sits in your basement, the more damage that can happen! From minor pooling to a severe flooding of the basement, repair costs can range anywhere from $10,000 to $50,000. These are just estimates. A professional will provide their own price quote based on their inspection of your basement.
There are some things that you can clean and tidy up yourself. But there are a lot of things that should be left to the professionals, such as the electrician. For example, there are specialists for checking your septic system after a flooded basement incident.
You can feasibly take care of your own replacement drywall and carpeting if you had done up your basement. Along with removing all water-damaged items in your basement, you should also be sure to disinfect everything that was within the water’s reach. You wouldn’t want any harmful bacteria to be lingering in your basement. The cleaning process will also help prevent mold from gaining a foothold.
Also, if you live in an area that you suspect may have flooding occur, be sure to double check with your homeowner’s insurance. See if there is coverage or an option for coverage against flooding. Flood insurance can do you a great favor in recovering from such an event. However, be sure to be thorough in your documentation in the event of a flood. Take lots of pictures and videos of the damage that has occurred.
Many wet basement situations are caused by what’s known as hydrostatic pressure. This pressure is created when water collects and sits against your foundation. As hydrostatic pressure builds, water can get pushed through the cold joints (such as the seam between the basement wall and floor slab) and moisture can seep through the porous concrete. After enough time and repeated pressure against the foundation, the concrete may crack, providing an easier way for water to leak in.
Knowing that hydrostatic pressure is the source, the question becomes how to prevent it from becoming a problem. There’s no way to completely keep water and moisture out of your basement. But you can take control of where that water and moisture goes. That’s what interior basement waterproofing can do for you.
For an interior basement waterproofing system, a waterproofing expert will install drainage channels along the inside perimeter of the basement. Those channels are designed to collect incoming water and lead them to a sump pit. Within the sump pit, a sump pump then pushes the water out of your home through a discharge pipe. The water is dispensed outside away from your home, so that it can’t reach your foundation. The end result is a reduction in hydrostatic pressure, and your basement remains dry.
Whether your French drains are failing, or you have a basement wall with leaking cracks, ’58 Foundations & Waterproofing has the high-quality products and honest methods to make your basement safe and dry once again with our basement waterproofing methods. From effective drainage channels to sump pump installation, we’ll help keep water out of your basement and foundation, so that you can have the peace of mind you deserve while using your basement. Call us today to schedule for a free basement waterproofing inspection and estimate!
For many crawl spaces, it is a frequent occurrence to have moisture seep up from the soil and collect into puddles. While our crawl space is supposed to be a buffer zone between moisture and your home’s living spaces, these occurrences of moisture seepage can lead to water damage to your house structure and create an environment that’s perfect for mold and pests.
Fortunately, crawl space encapsulation can help keep that moisture from affecting the rest of your crawl space and home. With the installation of a vapor barrier, moisture can’t reach the rest of your crawl space and affect the humidity of the air. But there are other measures which can also be put in place to further help keep that moisture out of your crawl space, such as sump pumps, dehumidifiers, and waterproofing measures. But how long does a crawl space encapsulation last? How long can you enjoy its protection?
With a properly encapsulated crawl space, you can expect your crawl space encapsulation to last as long or longer than 20 years, so long as nothing disastrous like a flood occurs. It’s important to see if your crawl space encapsulation will be backed by a warranty. Many crawl space encapsulations are covered for 15 to 20 years by warranty, but there are also ones with lifetime warranties or life of structure warranties.
When you have a case of a wet crawl space, it can take anywhere from eight to 10 hours to dry when using a dehumidifier. Once dry, if you’re interested in having your crawl space encapsulated, the process will usually take on average one to two days depending on the size of your crawl space.
Be sure to consult with a professional first to get a more accurate estimate of how long it will take to complete your crawl space’s encapsulation process. Due to the uniqueness of every home, no two crawl space encapsulation projects are the same, so there’s no sure answer until you have your crawl space inspected.
Whether you’re having a professional encapsulate your crawl space, or you’re trying to do it yourself, here are some helpful tips on how to ensure a successful encapsulation—one that will be effective and for a long time!
By following these steps, you’ll be able to help make sure that the crawl space encapsulation process goes smoothly and lasts for many years. If you’re getting help for your crawl space, a professional will also help inspect for any problems before beginning work, but it always helps to be prepared!
From our 20-mil thick liners to our Channel ’58 drainage channels, ’58 Foundations & Waterproofing has the crawl space encapsulation and waterproofing solutions to keep your crawl space free of moisture, making it a dry, healthy, and useable space once again! With over 60 years of experience in the industry and our quality products, you can depend on us to provide your crawl space with a personalized solution that works and lasts. Give us a call today to schedule for a free crawl space inspection and to receive a detailed estimate from one of our experts!
Water damage from flooding, leaks or even high humidity can not only compromise the structural integrity of your home but also create the perfect environment for mold to grow. Once moisture comes in contact with organic materials it can turn into a large mold infestation if not handled properly.
According to the Environmental Protection Agency (EPA), mold typically takes 24 to 48 hours to grow after a flood if the right conditions are met. However, it depends on the type of mold, the surfaces it is in contact with, the amount of moisture, and the temperature. As stated previously, mold thrives indoors, in darker, humid spaces. This makes your basement or crawlspace ideal. If it contains paper, wood, leather, or fabric made from natural fibers and is 70 degrees or more it will support mold growth. In general, the longer that moisture is present, the greater the chance for mold to grow and spread.
When mold begins to grow, it uses the surface materials as a food source. It will eat the organic materials and damage the structure. Like any basement pest, the longer the mold is allowed to eat the surface it is on, the more damage it will cause. This is why it is imperative for mold to be treated immediately as it will cause wood rot, feeding off your wooden floor joist. Eventually compromising the structural integrity of your home.
Beyond the potential structural damage to your home, mold can cause health issues. Mold can induce coughing, wheezing, and irritation to the skin and eyes. Similar to the materials it grows on, prolonged exposure can cause more serious problems.
If you’d like a professional evaluation of your basement mold contact ‘58 Foundations & Waterproofing for a free mold remediation inspection.
Worried about cracks you’ve found in your foundation? Is there water leaking down your basement wall when it rains? Foundation problems like these and more never get better on their own. They never correct themselves and the best that you can hope for is that they remain the same. The health of a foundation is similar in some ways to the health of a person. The sooner the problem is diagnosed and treated, the greater the odds of complete recovery. But the longer a foundation problem lasts, the more complex it becomes and the more expensive it is to repair. Foundation problems can spiral out of control to the point that it can cause further structural damage to other parts of your house. The real cost comes from doing nothing.
But before you call the first contractor your see, it is important to make sure that you’re putting your trust in a qualified foundation repair professional. Here’s why…
A poor job in repairing your foundation means having to repair it again. Your hard-earned money should go to a contractor that knows how to get the job done right and is proud to stand behind their work. The goal should be to repair your foundation and restore your peace of mind!
A trustworthy foundation repair company should at least meet these requirements…
No two homes are the same. Your foundation repair costs will depend on a variety of factors such as the size of your foundation, the severity of damages, and what kinds of foundation problems have been found. It can be as simple as repairing a small crack in your concrete foundation. Or it could be a combination of installing a basement waterproofing system, repairing cracked basement walls, and stabilizing a sinking foundation with helical piers. Ultimately, the best way to limit your foundation repair costs is to address your foundation problems as soon as possible. Do not allow those problems to get worse.
’58 Foundations & Waterproofing is a licensed and insured company that specializes in foundation repair as well as other services including basement waterproofing, crawlspace encapsulation, and even mold removal. We’re an award-winning company that’s been in business since 1958. For over 64 years, we’ve been committed to providing five-star customer experiences. We’re proud to use long-lasting and high-quality products such as our ’58 Strong Helical Piers, ’58 Strong I-Beams, and our Carbon ’58 Wall Straps to repair and stabilize house foundations just like yours.
We have local offices located all throughout the Eastern Seaboard. Whether you’re a resident near Knoxville, TN, Arlington, VA, or Atlanta, GA, you can always count on the expertise of ’58 Foundations & Waterproofing! Contact us today to schedule for a free inspection and receive a detailed price quote at no obligation. Be sure to ask us about our industry-leading life-of-the-structure warranty and money-back guarantee!
Doors that no longer open/close smoothly and evenly with the door jamb can be caused by something as simple as loose hinges. But it can also be from something a little harder to detect: a problem in the foundation. Before you get worried, be sure to check the hinges and hinge screws first—maybe it’s a quick fix!
If the door is properly connected to the door jamb, and there hasn’t been a change to the floor, then it’s time to check for other signs of foundation problems and not just assume changes in humidity are the cause of the door malfunction. But remember, if no other signs exist, problems like doors that don’t open/close correctly can be significant enough to warrant calling an expert for a full inspection. It’s always better to solve the problem before it gets worse.
Other common symptoms to check for:
Keep in mind that there are other symptoms of foundation problems not included in the short list above.
Before checking the house, it might be a good idea to learn about some common signs of water intruding into your basement or crawlspace—foundation problems can be caused by waterproofing problems and vice versa. Here are a few more common signs of water coming into your basement or crawlspace:
If the answer to any of these is yes, calling a professional who can solve your waterproofing and foundation repair needs is a good idea—neither of these go away on their own, but they both do get worse over time.
If you are noticing doors not opening or closing properly, we have the foundation repair solutions you need to solve these problems. Check with your nearest ‘58 Foundations & Waterproofing location for additional information.
It’s on its way! The cooler months of Fall and Winter are fast approaching, and various critters are looking for a place to shelter until Spring comes around. Amidst the spiders, mice, and other animals searching for some place warm, one of those critters is also the pesky stink bug.
Stink bugs are easy to spot with their triangular-shaped body. By nature, they’re actually quite harmless to humans, but when threatened they can release a chemical cocktail that creates that awful odor that can last up to an hour. While we may find one hitching a ride on us every now and then, it’s when things get cold that those same bugs come straight for the dark spaces of your home—such as your crawlspace.
Let’s take a dive into why stinkbugs have become such an issue for homeowners and what can be done about these little nuisances…
Due to the changing climate and longer warm seasons, stink bug populations have both been on the rise and have ranged farther out across Tennessee and 32 other states. There are the native green and brown stink bugs as well as the invasive brown marmorated stink bugs, but they all rely on temperatures staying comfortably warm before they venture out into the fields to eat and breed.
The native green stink bugs and brown stink bugs can tolerate higher temperatures than the brown marmorated stink bug, but all three species have found places that match their favorite temperature profile. The brown marmorated stink bug, for example, will dwell more around the slightly cooler regions where they live best. Meanwhile, the native species can be found in fields during the summer as they can enjoy slightly hotter temperatures. During the warmer seasons, stink bugs are frequently blamed for damage to their crops and gardens, as they often enjoy feasting on corn, soybeans, peaches, and even flowers. But that all changes as the temperature starts to drop—the feasting ends, and soon they start looking for a place to hibernate.
Once winter sets in, homesteads and urban areas become a huge draw for all types of stink bugs as people’s homes become oases of warmth for them. Since homes are generally kept at around 69 to 75 degrees Fahrenheit, it’s perfect for the stink bugs. They’ll seek out shaded areas with little human traffic—which is why we tend to find them in areas such as crawlspaces, where there’s enough warmth and moisture to live and hibernate (a hibernation state known as diapause) safely. This kind of hibernation is a bit different from the kind that we often associate with certain mammals. Stink bugs, amongst other insects, may go into dormancy as early as autumn, well-preparing them before the actual winter comes.
Keeping stink bugs out of your home requires some preparations before the Fall season. Here are some of the steps that you should take before the cool weather sets in, as recommended by the EPA…
Having entries into your house properly sealed is important to keep all manner of pests out. Your crawlspace entryways can provide an especially easy and dark place for those stink bugs to hide out until Spring returns. Crawlspaces are moist, dark, and humid—in the face of winter, it makes for a far more comfortable place to hibernate than outside. Fortunately, there’s a reliable way to seal your crawlspace from both stink bugs and the warm moisture that can make a crawlspace so attractive to them.
’58 Foundations & Waterproofing specializes in crawlspace encapsulation, and has provided solutions for thousands of homeowners! From our 20-mil thick linings and our HumidiGuard™ dehumidifier to our Therma Fit crawlspace vent blocks, we can keep your crawlspace safe, dry, and sealed from both unwelcome moisture as well as those annoying stink bugs. We take pride in our quality products and honest methods, and we look forward to showing you how our long history of experience brings better results to your home! Give us a call at (866) 485-6695 and we’ll have a crawlspace specialist provide you with a free inspection and a zero-obligation price estimate!


We respect your privacy. By submitting, you authorize '58 Foundations and Waterproofing to reach you via call, email or text for information about your project needs. We will never share your personal information with third parties for marketing purposes. You can opt out at any time. Message/data rates may apply. Consent is not a condition of purchase. Privacy Policy