
Free Estimate
888-698-1958
Call for Priority Scheduling
888-698-1958
Call for Priority Scheduling
Book Online
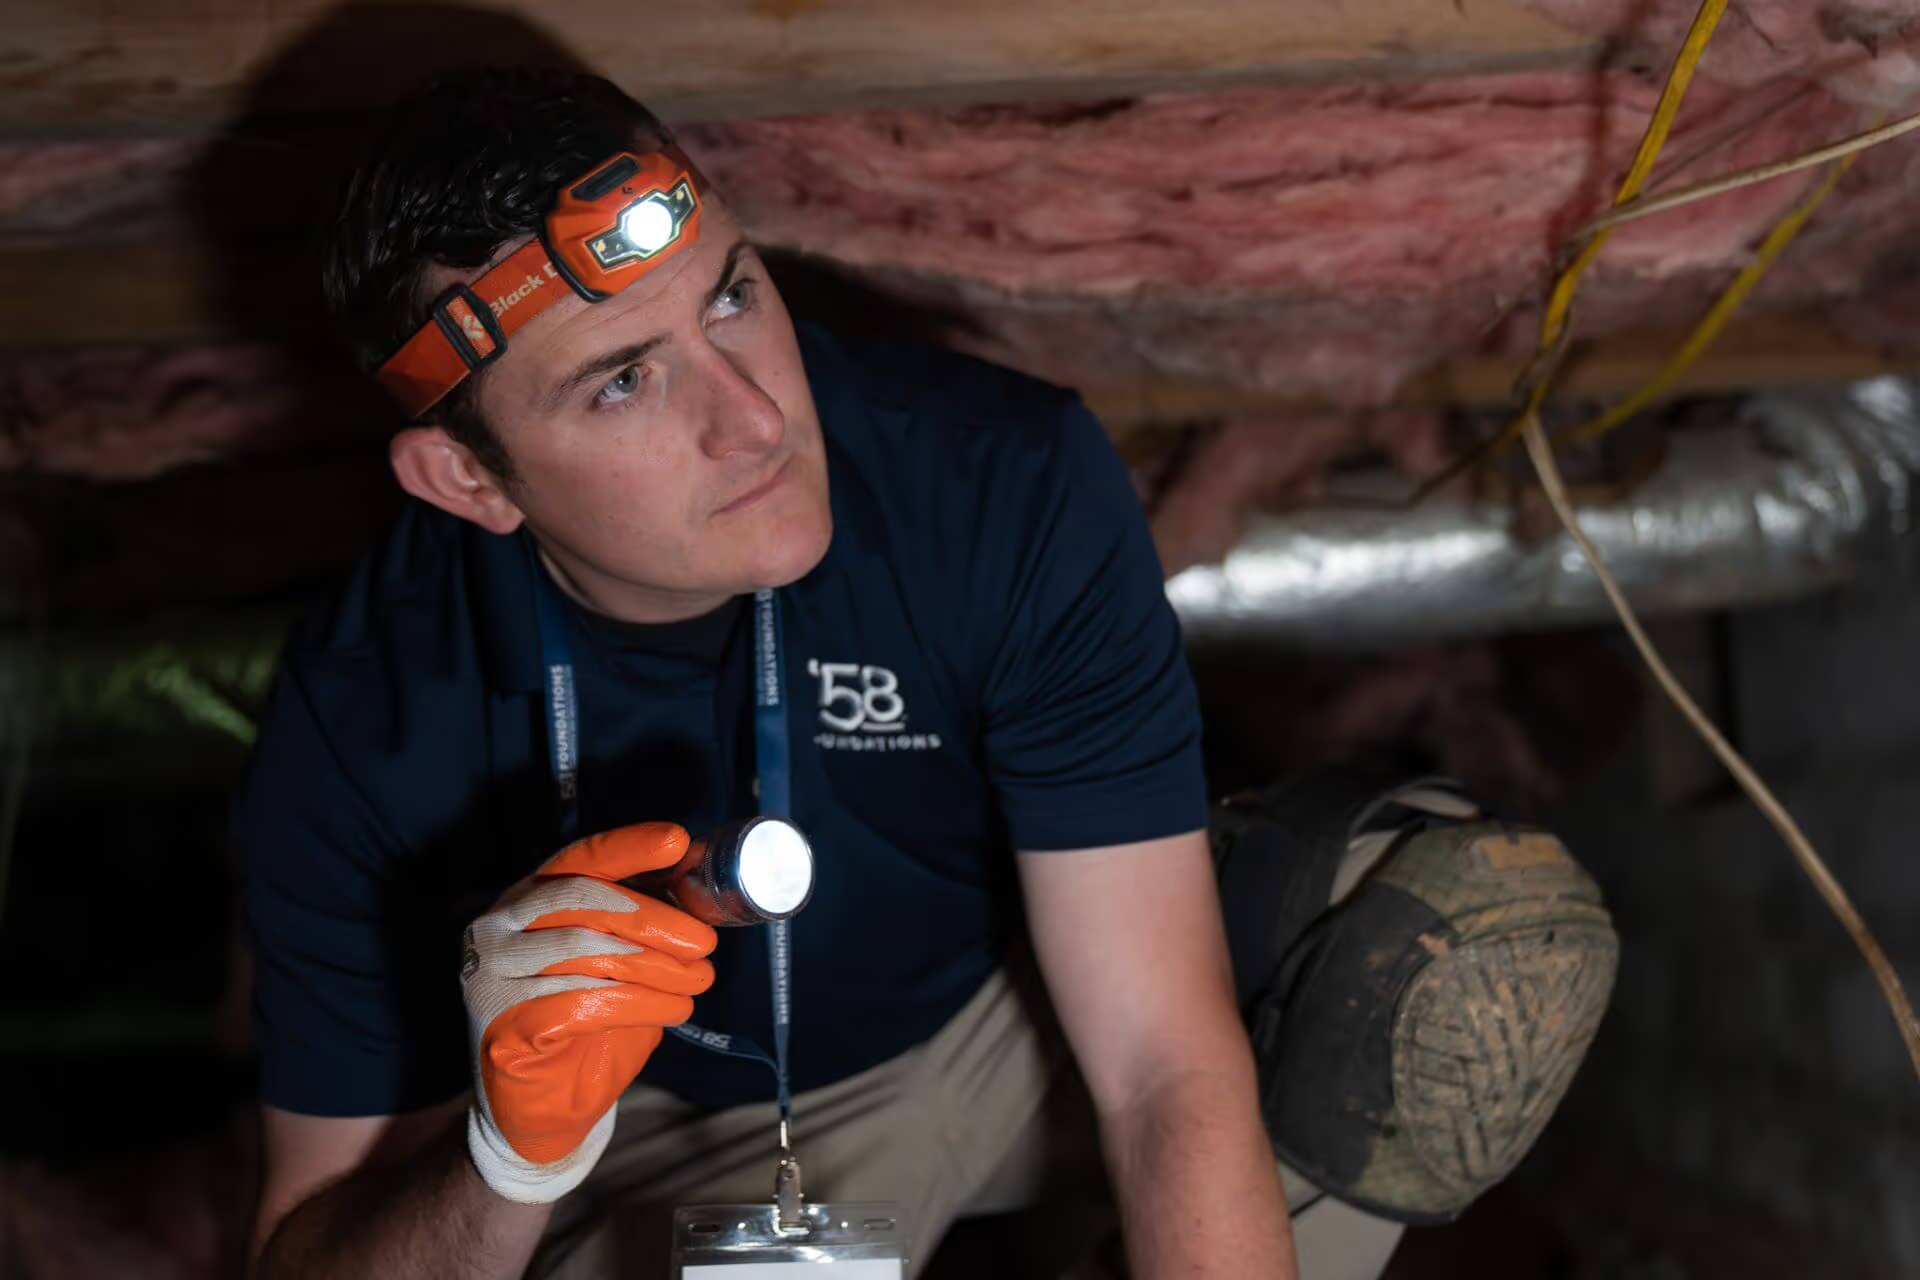
'58 Foundations & Waterproofing's TotalCare™ membership gives homeowners an annual professional inspection of their foundation repair or waterproofing system, along with priority scheduling, member pricing, and a documented report after every visit. A Certified Foundation Specialist tests the system and flags anything that needs attention, building a record of the home's condition over time.
A sump pump's float switch and check valve are mechanical parts, and mechanical parts wear. A pump that ran perfectly the day it was installed can start lagging on its cycle time or fail to trigger at all several years later, often without any visible sign until the next heavy rain puts it to the test. The same kind of gradual change happens below the surface and along seams. Structural piers are set to a specific benchmark depth and elevation at installation, and confirming that benchmark still holds means measuring it again, not assuming the original reading is still accurate. Encapsulation liner seams, sealed with tape at installation, can loosen slightly as a crawl space moves through seasonal humidity and temperature swings.
None of this points to a flawed installation. Soil moisture shifts with the seasons, groundwater levels rise and fall, and a home settles in small increments that aren't visible from the surface. An annual inspection is how a slower sump pump cycle, a shifted benchmark reading, or a loosened seam gets caught while it's still a minor fix, before it turns into standing water or a repeat of the original problem.
A Certified Foundation Specialist arrives with a checklist built around confirming that every installed system is still performing the way it did on day one. That means testing mechanical components, re-measuring structural benchmarks, and inspecting the physical condition of seams, drains, and barriers rather than relying on a visual walkthrough alone.
Each of these checks gets logged individually, with its own pass/fail result and any measurements taken, rather than folded into a single overall pass/fail for the visit.
Every maintenance visit results in a written report covering the inspection findings, system performance observations, benchmark verification results, and any maintenance actions completed that day, along with photo documentation of the system's condition. If the specialist identifies something that needs attention, the report includes a specific recommendation rather than a general note to keep an eye on it. Over several years of visits, this creates a comparable record of how the system has performed, measurement to measurement, rather than a single snapshot in time.
Membership also changes what happens if something comes up between scheduled visits. Enrolled homeowners get priority scheduling for service needs outside the annual inspection, rather than being booked into the standard queue. '58 Foundations & Waterproofing also tracks each member's maintenance schedule and expiration date directly, so the notification to schedule the next visit comes from the company rather than depending on the homeowner to remember a renewal date. On top of that, members receive discounted pricing on qualifying services and repairs beyond what the membership itself covers.
Both membership options include the same annual visit, the same documentation after every inspection, and the same priority scheduling and member pricing. The difference is in cost and how many years of coverage are locked in up front.
1-Year TotalCare™: $249, billed annually. Renews each year at the same rate unless canceled.
5-Year TotalCare™: $499 total. Covers five annual visits, a savings of $745 compared to renewing the 1-Year option five times.
A homeowner planning to stay in the home for several more years can lock in the 5-Year rate now. A homeowner who wants to commit one year at a time, or isn't sure how long they'll be in the home, gets the same visit and documentation with the 1-Year option.
'58 Foundations & Waterproofing offers TotalCare™ enrollment directly through your Service Advisor. If you've already had a foundation repair or waterproofing system installed, ask about adding TotalCare™ at your next visit, or reach out to enroll before your next scheduled inspection is due.
Hydrostatic pressure is the force saturated soil exerts against your foundation as water looks for somewhere to go. It's the root cause behind most basement water problems, including seeping cracks, bowing walls, and efflorescence. The damage is cumulative, and interior drainage systems with a sump pump are the most reliable way to manage it.
You've noticed it after a hard rain. Maybe it's a damp patch spreading across the lower half of a wall, or water beading up along the joint where the floor meets the foundation. You dry it out, and a few weeks later it's back. It's easy to assume there's a crack somewhere letting water in, and there probably is, but the crack isn't really the problem. The problem is the force behind it.
That force has a name: hydrostatic pressure. It's the reason water keeps finding its way into basements even after cracks are patched, and it's the reason a dry basement in August can turn into a wet one by October. Understanding what it is and where it comes from is the first step toward actually stopping it.
Hydrostatic pressure is the force that saturated soil exerts outward as water looks for somewhere to go. When rain soaks into the ground around your home, it fills the spaces between soil particles and accumulates in layers. The deeper the water table, the more weight is stacked above it, and the greater the pressure pushing against your foundation. Concrete and block walls handle vertical load well, but sustained lateral pressure from waterlogged soil is a different kind of stress. Over time, that outward push finds the path of least resistance, which is usually a hairline crack, a porous section of concrete, or the joint where your floor meets the wall.
It helps to think of your basement walls as a dam. A dam holds back water not because water isn't trying to get through, but because it's engineered to resist that force. A residential foundation wasn't built with the same intent. It was built to hold a house up, not to hold back a saturated hillside indefinitely.
Soil type, drainage, and the way your property is graded all affect how much water accumulates against your foundation and how fast it gets there. Not every home faces the same conditions, and some are set up in ways that make pressure significantly worse than it needs to be.
Any one of these conditions increases the load your foundation is working against. When two or three are present at the same time, the pressure compounds.
Contact '58 Foundations & Waterproofing
Hydrostatic pressure doesn't announce itself all at once. Most homeowners notice small things first: a damp patch on the lower portion of a wall, a white chalky residue along the base, a smell that wasn't there before. Those are early signs that pressure is working on the foundation. Left alone, the damage becomes more significant.
The most common effects include:
These symptoms share a common thread: they're all driven by the same force pushing from outside the wall, not by isolated defects in the concrete itself.
A small crack that lets in a trickle of water today creates a wider path for water tomorrow. As water moves through concrete it gradually erodes the material around the opening, making the gap larger with each cycle. A wall that shows early signs of bowing is already past the point where pressure has overcome its resistance. The further it moves, the more expensive and invasive the repair becomes.
Mold is another compounding factor. Persistent moisture along walls and at the cove joint creates the conditions mold needs to establish itself, and once it does, remediation adds cost and complexity to what started as a water problem. Wood framing and structural members in contact with a chronically damp foundation face the same risk from rot.
There's also the issue of home value. A wet basement that has been active long enough to show staining, efflorescence, and cracks is a disclosure item that buyers and inspectors will flag. Addressing it proactively is almost always less costly than addressing it under the pressure of a sale.
Hydrostatic pressure can't be eliminated entirely, but it can be managed. The goal is to give water a controlled path out before it builds enough force to cause damage.
Interior drainage systems are the most reliable solution for most homes. A channel installed along the perimeter of the basement floor collects water at the cove joint and directs it to a sump pit, where a sump pump moves it out of the house. This relieves pressure before it reaches the walls.
Exterior improvements like regrading and downspout extensions reduce the volume of water reaching the soil around your foundation in the first place. They aren't a substitute for interior drainage in a home that already has pressure-related damage, but they reduce the load.
Crack repair alone isn't a solution. Sealing a crack from the inside without addressing the pressure behind it is temporary. Water will find another path, or widen the one that was patched.
If you've noticed damp walls, seeping cracks, or efflorescence in your basement, hydrostatic pressure is likely behind it. The sooner it's assessed, the more straightforward the solution tends to be. Contact '58 Foundations & Waterproofing to schedule a free inspection with a Certified Foundation Specialist.
Basement water can show up in a dozen different ways, like musty smells, damp walls, or standing water after it rains. And once it’s there, it’s only a matter of time before it affects your foundation, indoor air quality, and comfort.
When homeowners look for a solution, most end up choosing between two main options: interior waterproofing, which is installed from inside the basement, and exterior waterproofing, which requires digging around the outside of the foundation. Both systems are designed to manage water, but they do it in very different ways.
At ’58 Foundations & Waterproofing, we’ve installed thousands of systems across the Mid-Atlantic and Southeast. We know what works and what holds up, through humid summers, clay-rich soils, and frequent storms. Below, we’ll break down the differences, show where each method fits, and explain why interior systems are often the smarter choice for existing homes.
Exterior waterproofing keeps water away from the foundation by sealing and draining it before it ever reaches your basement walls. It’s a full-scale approach that typically involves digging down to the footings and rebuilding a barrier from the outside in.
Here’s what that usually includes:
This method can be effective when installed correctly, especially on new construction. But it’s one of the most labor-intensive and expensive options for existing homes. If you have landscaping, driveways, or patios, those will likely be disturbed, and if any part of the system needs repair later, re-excavation may be required.
Interior waterproofing manages water after it enters through the foundation, but before it becomes a problem. Instead of fighting pressure from the outside, it creates a controlled path to collect and redirect water away from your basement and out of your home.
This is the solution we recommend most often at ’58 Foundations & Waterproofing. It works reliably across a wide range of homes and soil conditions, and it doesn’t require any digging or disruption to your yard.
A typical interior system includes:
Interior waterproofing is ideal for finished basements, older homes, and properties with ongoing seepage or damp walls. It’s installed entirely from inside the home, can be completed in a day or two, and is easier to maintain over time.
Not sure which waterproofing system makes more sense for your home? Here’s how interior and exterior methods stack up across key factors:
| Category | Exterior Waterproofing | Interior Waterproofing |
| Installation | Excavation to expose the foundation, followed by sealing and an external drainage system | Installed inside the basement along the perimeter with drains, a sump pump, and moisture control |
| Disruption | Major disruption to landscaping, patios, walkways, and access | Work stays inside with no excavation or impact to exterior features |
| Cost | Higher due to labor, equipment, and site restoration | Lower overall cost with minimal labor and no digging |
| Water Control | Stops water at the exterior foundation wall | Collects and redirects water safely once it enters |
| Timeline | Can take several days to complete | Most systems are installed in 1–2 days |
| Maintenance | Repairs may require re-excavation | Easy to inspect and service from inside the home |
| Best Use Case | New construction or open foundation access | Existing homes with seepage, dampness, or drainage issues |
Every home is different, and the right waterproofing system depends on the structure, soil conditions, water intrusion patterns, and long-term goals. But in most cases, especially for existing homes, interior waterproofing is the more practical solution.
It’s less invasive, more affordable, and easier to maintain. You won’t need to tear up your landscaping or worry about future repairs requiring excavation. For common basement issues like seepage, musty odors, or pooling water near the walls, an interior system is typically the best fit.
Exterior waterproofing still has its place. It can be a smart option during major renovations or new construction when the foundation is already exposed. In those situations, applying an exterior membrane and drain system can add another layer of protection from the outside in.
At ’58 Foundations & Waterproofing, we never push one-size-fits-all answers. We start with a thorough inspection, explain what’s happening under your home, and walk you through the options with no pressure. Whether you need interior drainage, exterior sealing, or a custom hybrid approach, we’ll help you choose based on what works and not what costs more.
If your basement feels damp, smells musty, or shows signs of water seepage, it’s time to take a closer look. At ’58 Foundations & Waterproofing, we’ve helped thousands of homeowners protect their basements with solutions that last.
We’ll inspect your basement for free, explain what’s really going on, and give you clear options that fit your home and budget. Whether you’re dealing with water after every storm or just want peace of mind before finishing a basement, we’re here to help.
Schedule your free inspection today and let our team help you take back your basement for good.
Most homeowners don’t think much about the air in their home until something starts to feel off. Perhaps it’s a headache that only appears indoors. A smell in the basement that never really goes away. Or a family member who always seems to breathe easier outside than in.
Often, the problem isn’t something you can see. It’s something you’re breathing.
Volatile Organic Compounds, or VOCs, are invisible gases released by common materials throughout your home. They’re more concentrated in places like basements and crawl spaces, where airflow is poor and moisture hangs in the air. And while they might not sound like a big deal, VOCs can affect everything from your comfort to your long-term health.
At ’58 Foundations & Waterproofing, we’ve spent decades protecting homes from water, mold, and structural damage. But just as important is the environment inside, where your family eats, sleeps, and breathes. Here’s what you need to know about VOCs, why your home’s lower levels matter, and what you can do about it.
VOCs are gases released into the air by certain materials, often without you even realizing it. The full name is “volatile organic compounds,” but don’t let the word “organic” fool you. In this case, it just means the compounds are carbon-based, not natural or healthy. Many VOCs come from man-made products, and some can be harmful in high amounts.
You’ll find them in paints, wood finishes, cleaning products, adhesives, insulation, carpet, and even furniture. If you’ve ever caught a whiff of that “new carpet” or “fresh paint” smell, that’s a sign of VOCs being released into the air.
The problem is that these gases don’t just disappear. In areas with poor ventilation, like basements and crawl spaces, they tend to build up over time. You may not see or smell anything, but you could still be breathing in low levels of chemicals every day.
VOCs are released by a wide range of materials and products found in most homes. Some are obvious, like paints or strong cleaning sprays. Others are quietly built into the house itself.
Common sources include:
Many of these items are tucked away in crawl spaces or basements, places we rarely think about but where moisture and time can cause materials to off-gas more quickly.
And because these areas often have poor ventilation, VOCs don’t just release into the air; they accumulate.
They might not smell strong or obvious at first. But over time, they can linger, build up, and slowly find their way into the air you breathe upstairs.
Crawl spaces and basements are some of the most overlooked areas in a home, but they have a bigger impact on your air quality than most people realize. These lower levels are often where VOCs are most likely to gather and go unnoticed.
Why?
Because they tend to be:
But the real issue isn’t that these gases stay down there. It’s that they don’t.
Through a process called the stack effect, air from your crawl space or basement naturally rises into the rest of your home. So even if you never step foot in those areas, the air you’re breathing upstairs may have started down below, carrying with it moisture, musty odors, or chemical traces from VOCs.
It’s one of the reasons homeowners might say:
These spaces don’t just store clutter; they set the tone for your home’s air.
Not everyone reacts to VOCs the same way. Some people might notice symptoms right away, while others only feel the effects after long-term exposure. It depends on your sensitivity, the amount of VOCs in the air, and how well your home is ventilated.
But even at low levels, VOCs can cause noticeable problems, especially in enclosed spaces.
Common symptoms include:
In homes with high humidity or poor ventilation, these symptoms can become more persistent. People with asthma, allergies, or other respiratory conditions may be even more affected.
And while the occasional exposure isn’t usually dangerous, long-term contact with high levels of VOCs has been linked to more serious health concerns, especially when combined with mold, dust, or other indoor air pollutants.
If you’ve ever wondered why your home doesn’t feel quite right, even when it looks clean, VOCs may be part of the reason.
VOCs are invisible. They don’t leave behind puddles or cracks. But they can still show up, through smells, symptoms, or that nagging sense that something in your home just feels… off.
Here are some common signs that VOCs could be building up in your crawl space, basement, or living areas:
You don’t need to check every box to have a problem. Often, it’s just one or two things that add up over time and leave you searching for answers.
If you’re starting to suspect VOCs are part of what’s going on in your home, the next steps don’t have to be complicated. In many cases, it starts with controlling the environment, especially in the areas you don’t think about often.
Moisture is one of the biggest triggers for VOC release. When building materials like wood, insulation, or adhesives are exposed to damp conditions over time, they tend to break down faster and release more gases into the air. That’s why basements and crawl spaces are such common trouble spots. Drying them out and keeping them dry can make a real difference.
Encapsulation and waterproofing systems help reduce that ongoing moisture. By sealing off the ground with a vapor barrier and preventing water intrusion, you’re limiting one of the key conditions that allow VOCs to build up. Even if those gases aren’t fully eliminated, the space becomes more stable, and that’s a step in the right direction.
It’s also worth taking a close look at what’s being stored in those areas. Old paint cans, cleaners, solvents, or treated wood can all release fumes even when sealed. Removing what you can, or at least isolating it from the open air, may help.
For homes with more serious air quality concerns or if symptoms are ongoing, it may be helpful to talk with an indoor air quality specialist. Testing equipment can sometimes pinpoint the source of specific gases or contaminants to guide you toward more specialized remediation if needed.
But for many homeowners, the first meaningful step is simply this: dry the space, seal out what doesn’t belong, and stop the environment from working against you.
Summer brings heat, humidity, and sudden storms, and all of them can put pressure on your home’s structure. Crawl spaces and basements are especially vulnerable this time of year, and foundation issues can quietly worsen during long dry spells. If you're a homeowner in the Southeast or Mid-Atlantic, knowing how to protect your home during summer can prevent major repairs down the road.
When warm, humid air enters your crawl space, it doesn’t just feel uncomfortable; it creates the perfect environment for mold, mildew, and wood rot. That moisture condenses on cooler surfaces like ductwork, plumbing, and floor joists. Over time, this can damage your home’s structure and lead to air quality problems throughout the living space above.
If your crawl space isn’t sealed, summer is the season when you’ll feel the effects the most. A crawl space encapsulation provides a lasting solution by sealing out moisture and stabilizing the air inside. For homeowners in particularly humid areas, adding a professional-grade dehumidifier can further protect against damage.
Summer storms tend to be brief and intense, which can spell trouble for basements. When heavy rain hits, gutters and downspouts may not be able to carry water away quickly enough. The surrounding soil becomes saturated, and water begins finding its way inside through cracks, gaps, or unprotected foundation walls.
If your basement smells musty or you’ve noticed water stains, puddles, or damp walls after storms, your home may need more than just a quick cleanup. Installing a sump pump system or interior drain tile can keep water moving away from your foundation and out of your home before it becomes a larger problem.
It’s not just rain that creates risk in the summer; long dry periods can be just as damaging. When clay-rich soil dries out, it shrinks and pulls away from the foundation. That shift in support can cause sections of your foundation to settle unevenly, leading to cracks, warped door frames, and sloping floors.
These signs are often subtle at first but become worse over time. If caught early, foundation settlement can often be stabilized using helical or push piers. These systems anchor your home to solid ground below the shifting soil, preventing further movement.
A damp crawl space is an ideal habitat for pests during the summer. Rodents, insects, and other intruders are drawn to dark, humid areas, and if your crawl space is unsealed or cluttered, it becomes an easy target. Once they move in, they can damage insulation, wiring, and even structural components.
Encapsulation doesn’t just keep moisture out. It also blocks off entry points and removes the conditions that attract pests in the first place. A sealed crawl space is quieter, cleaner, and far less appealing to summer invaders.
When outdoor temperatures soar, most people shut their windows and run the AC full-time. But if the air in your crawl space or basement is full of moisture and mold spores, that air eventually ends up circulating through your home. Poor air quality isn’t always obvious, but it can trigger allergies, asthma, and fatigue, especially for families with young children or older adults.
The best defense is a combination of waterproofing and air control. Sealing the crawl space, addressing drainage issues, and using a dehumidifier help maintain healthier air throughout the house.
Don’t wait until the damage is done. ‘58 Foundations & Waterproofing offers free inspections and proven solutions to keep your crawl space, basement, and foundation protected year-round. Whether you’re seeing signs of moisture, cracks, or just want peace of mind, we’re here to help.
Call today to schedule your free inspection and stay ahead of summer’s hidden threats.
Waterproofing a basement is one of the most important steps you can take to protect your home from water damage, mold, and structural issues. A basement that is not properly waterproofed can lead to serious problems, including foundation cracks, flooding, and unhealthy living conditions. With several waterproofing methods available, homeowners often wonder which is the best option. The answer depends on the specific needs of your basement, the source of the water intrusion, and your budget. In this article, we'll explore the most effective basement waterproofing methods, their advantages and disadvantages, and how to choose the right solution for your home.
Before diving into the different waterproofing methods, it’s essential to understand why basements leak in the first place. Common causes of basement water issues include:
Understanding the source of the water intrusion is crucial for choosing the best waterproofing method. A comprehensive inspection of your basement and foundation will help identify the root cause of the problem.
Exterior waterproofing, also known as "positive-side" waterproofing, involves stopping water from entering your basement by creating a barrier on the outside of your foundation. This method is considered one of the most effective ways to prevent water from penetrating your basement walls.
Interior waterproofing, also known as "negative-side" waterproofing, involves managing water that has already entered the basement. This method focuses on directing water away from the foundation and managing moisture within the basement.
Waterproofing paints and sealants are a popular option for homeowners looking for a quick and inexpensive way to manage minor moisture issues in their basement. These products are applied directly to the interior walls and floors and create a barrier that helps prevent water from seeping through.
Drainage systems are a critical component of both interior and exterior waterproofing methods. These systems are designed to collect and redirect water away from the foundation, preventing it from entering the basement.
Choosing the best waterproofing method for your basement depends on several factors, including the source and severity of the water intrusion, the condition of your foundation, and your budget. Here are some considerations to help you decide:
There is no one-size-fits-all answer to the question of which waterproofing method is best for basements. The right solution depends on the specific circumstances of your home, including the severity of water issues, the condition of your foundation, and your budget. Exterior waterproofing is often considered the most effective and long-lasting solution, particularly for significant water intrusion. However, interior waterproofing methods can be highly effective for managing moisture and minor water issues, especially when combined with a comprehensive drainage system. To ensure you choose the best method for your basement, it’s important to have a professional inspection to identify the source of the problem and recommend the most appropriate solution. Proper waterproofing is an investment in the longevity of your home, protecting it from water damage, mold, and structural issues for years to come.
If you are in the market for basement waterproofing calling in a professional such as ’58 Foundations and Waterproofing that specializes in these services can help. We will provide you with a zero obligation FREE inspection to help you determine the severity of your situation and the best solutions available. Remember that putting an inspection off can lead to more costly remedies down the line.
Waterproofing a basement is a crucial step in protecting your home from water damage, mold growth, and structural issues. When faced with basement moisture problems, many homeowners wonder whether they can tackle the waterproofing process themselves or if they should hire a professional. While some aspects of basement waterproofing can be handled as DIY projects, others are more complex and may require professional expertise. In this article, we'll explore the different aspects of basement waterproofing, assess which tasks are suitable for DIY, and provide guidance on when it's best to call in the experts.
Before deciding whether you can waterproof your basement yourself, it’s important to understand what basement waterproofing entails. The goal of waterproofing is to prevent water from entering your basement and to manage any moisture that does make its way inside. This typically involves a combination of exterior and interior waterproofing methods, as well as proper drainage systems.
Key components of basement waterproofing include:
If you're considering waterproofing your basement yourself, there are several tasks that you can likely handle, especially if the moisture issues are minor. Here are some DIY-friendly basement waterproofing methods:
While some basement waterproofing tasks are suitable for DIY, others are more complex and require professional expertise. Here are some scenarios where it's best to hire a professional:
If you decide to tackle some aspects of basement waterproofing yourself, it’s important to prepare properly to ensure success. Here are some steps to take before starting your DIY project:
Waterproofing your basement is a vital task to protect your home from water damage, mold growth, and potential structural issues. While some aspects of basement waterproofing can be tackled as DIY projects, others require professional expertise to ensure effective and long-lasting results. Simple tasks like sealing cracks, applying waterproof coatings, and improving drainage can be done by homeowners, especially for minor moisture issues. However, severe water intrusion, foundation repairs, exterior waterproofing, and mold remediation are best left to professionals who have the necessary skills, tools, and experience.
Before starting any DIY waterproofing project, it’s important to assess the severity of the moisture problem, gather the right tools, and plan your approach carefully. If you’re unsure about the extent of the issue or the best solution, consulting with a professional can provide peace of mind and help you avoid costly mistakes. Ultimately, the key to successful basement waterproofing is to address the problem at its source, whether that requires a DIY solution or the expertise of a professional.
If you are experiencing potential issues with a damp or wet basement calling in a professional such as ’58 Foundations and Waterproofing that specializes in these services can help. We will provide you with a zero obligation FREE inspection to help you determine the severity of your situation and the best solutions available. Remember that putting an inspection off can lead to more costly remedies down the line.
Discovering mold in your basement can be alarming. Not only is mold unsightly and unpleasant, but it also poses serious health risks and can lead to significant structural damage if left untreated. The good news is that a moldy basement can indeed be fixed, but the process requires thorough assessment, remediation, and preventative measures to ensure that the problem doesn’t return. In this article, we’ll explore the steps involved in fixing a moldy basement, from identifying the cause of the mold growth to implementing long-term solutions.
Mold thrives in environments where moisture is present. Basements are particularly susceptible to mold growth because they are often damp, dark, and poorly ventilated. Mold can grow on a variety of surfaces, including wood, drywall, insulation, and carpeting. The key to fixing a moldy basement is addressing both the mold itself and the underlying moisture issues that allowed it to grow in the first place.
Before you can effectively fix a moldy basement, it’s important to assess the extent of the problem. Mold can be visible on surfaces, but it may also be hidden behind walls, under flooring, or in insulation.
Inspection Tips:
Mold will continue to grow as long as moisture is present, so identifying and addressing the source of moisture is a critical step in fixing a moldy basement.
Common Moisture Sources and Solutions:
Once the source of moisture has been addressed, the next step is to remove the existing mold. Mold removal can be a DIY project for small areas, but larger infestations or toxic molds, such as black mold, may require professional remediation.
After mold removal, the affected areas may need to be repaired and restored. This can include replacing damaged drywall, insulation, flooring, and other materials. It’s important to use mold-resistant products when restoring your basement to reduce the risk of future mold growth.
To ensure that your basement remains mold-free, it’s important to implement long-term preventative measures. These steps will help you maintain a dry, healthy basement and prevent mold from returning.
While many homeowners can successfully address mold issues on their own, there are situations where professional help is necessary:
A moldy basement can be a serious problem, but with the right approach, it can be fixed. The key to success lies in thoroughly addressing both the mold itself and the underlying moisture issues that allowed it to grow. By following the steps outlined above—assessing the extent of the problem, addressing moisture sources, removing mold, repairing damage, and implementing long-term preventative measures—you can restore your basement to a healthy, mold-free condition.
In some cases, particularly with widespread or toxic mold, professional remediation may be necessary to ensure the safety and effectiveness of the cleanup process. Whether you handle the issue yourself or seek professional help, taking action to fix a moldy basement will protect your home and your health, giving you peace of mind and a safer living environment for years to come.
If you are experiencing potential mold issues in your basement calling in a professional such as ’58 Foundations and Waterproofing that specializes in these services can help. We will provide you with a zero obligation FREE inspection to help you determine the severity of your situation and the best solutions available. Remember that putting an inspection off can lead to more costly remedies down the line.
A sump pump is designed to protect your basement from the risk of flooding by draining water that accumulates in a sump pit. But if you’ve noticed that your sump pump keeps running, this usually means there’s a problem with your sump pump. These problems can happen regardless of the weather conditions or season, and it should be promptly fixed before the overworked pump burns out. Ensuring that your sump pump is working properly is critical to keeping your waterproofing system in working order.
Here are the most common causes for sump pumps going into overdrive.
When water enters the sump pit it begins to fill, and when it reaches a certain level the float switch triggers to turn the pump up and drain the water. When the water returns to the appropriate level, the pump turns off. However, when the float switch malfunctions it will continue to run as it is incorrectly signaling that there is still water.
When a sump pump is not powerful enough to handle the water coming in it needs to run continuously to keep up. On the flip side, if the sump pit is too small. Even if the sump pump is powerful enough the small pit will fill up too fast and constantly trigger the sump pump to keep working.
Underground water leaks can be caused by roof runoff from a damaged gutter, a leaking drain line from a sprinkler, or a burst pipe below ground. When any of these should occur it can cause water to seep into the sump pit. The sump pump will continue to push the water out. However, the underlying issue of the leak will remain unresolved. If this goes unnoticed, the water from those underground water leaks can both damage your home’s foundation and potentially burn out the sump pump.
A high water table can cause your sump pump to run continuously. It will run to prevent the basement from flooding. Heavy rainfall or snow melt can provoke or worsen this problem.
A check valve inside the discharge pipe prevents water from flowing back into the sump pit. The discharge line carries water from the sump pump pit to a location sufficiently away from your home’s foundation. If the check valve has failed, the water will flow back into the sump pit. Ultimately, this will cause the sump pump to continuously run.
When your sump pump runs constantly there are many possible concerns besides just the electricity bill. If it continues to run, there is a risk of burn out and your basement flooding. Whatever the reason for your sump pump running continuously, it is recommended to contact a sump pump repair professional to ensure that any necessary repairs are made.
Sump pumps are a key part of what makes an interior waterproofing system work. If there is sump pump failure, water can’t be evacuated properly out of your lower level, leading to flooding.
Regular maintenance is key to keeping your sump pump performing well for the duration of its life span. But when a sump pump begins to break down, it’s important to have your sump pump replaced as necessary. Consider also a battery backup sump pump to make sure that your waterproofing works even in the event of a primary pump failure or a power outage. Having a battery backup can be especially important in being prepared for heavy rain storms.
Whether your sump pump system needs repairs or an upgrade, ’58 Foundations & Waterproofing has the solutions you need! Our high-powered Workhorse sump pumps and battery backup sump pump options can keep water moving fast while also ensuring that you have a functioning sump pump when it’s really needed. We also offer our own specially-engineered waterproofing products including our high-capacity Channel ’58 drainage channels. When it comes to protecting your foundation and lower level from moisture and groundwater intrusion, you can always lean on ’58!
We have local offices throughout the Eastern Seaboard with ’58 experts ready to help! Whether you live near Baltimore, MD, Knoxville, TN, or Atlanta, GA, we’ll be there to make sure your sump pump system keeps working! Contact us today to schedule for a free inspection and to receive a detailed estimate!
Concrete is one of the most common construction materials we use today. From our roads and pathways to towering skyscrapers, it’s present in our everyday lives. It is also what makes up our residential foundations, providing a strong and solid platform for our homes to remain stable. Concrete consists of a mix of ingredients, which together creates this strong material. One of those crucial ingredients is water. But the relationship between your concrete foundation and moisture can be complex.
Water and moisture is important to our ability to live. It is also a key component to the making of concrete. Without water, our concrete wouldn’t be able to strengthen and cure. But water can also be a destructive force of nature when poorly controlled or when in excess—whether it’s too much humidity in a crawlspace or enough rain to cause a flash flood. This can be said of our popular concrete as well. Too much moisture in your concrete can wreak havoc upon it, potentially compromising the structure that’s been built with it.
Moisture is present all around us but may be in different forms. As such, there are numerous ways that excess moisture can invade into your concrete foundation. Here are some of the common ways that moisture gets into your concrete…
Fortunately, there are ways to address each of these in a way that will keep your foundation lasting for longer and protect your home from moisture invasion. From foundation repair and basement waterproofing to encapsulation and dehumidifying, your lower level and foundation may require a different combination of solutions depending on where you live. If you’re having your concrete placed, it’s important to make sure it dries and cures properly, and that will require proper ventilation and knowledge about your climate. As Polygon states about controlling moisture in concrete, “excessive moisture is most problematic in concrete when there is a lack of climate control and air circulation”.
Even after ensuring that your concrete has dried and cured properly, it’s important to keep excess moisture at bay. The appearance of your concrete can be deceiving, so taking measures to control that moisture is key as Buildings.com points out that “a concrete surface can easily give a false impression of being dry enough despite containing moisture well above the allowable limits.” This is because excess moisture doesn’t necessarily have to be in the obvious form of water leaking down your basement wall, for example. It can also be in the form of moisture vapor seeping its way through your concrete slab.
When we think of concrete, we think it’s solid. But by nature, concrete is actually porous, which means that moisture can evaporate and move its way through capillaries within the concrete. This doesn’t seem significant, but across the surface of a foundation, that can amount to a lot of potential moisture coming from it, even if the concrete seems like it has cured and dried well. It is important to understand the moisture that exists within the surrounding soil of your foundation and to ensure that you have the proper measures in place to protect against moisture invasion.
Here are some problem scenarios that your concrete may experience due to excess moisture…
These various problems can result in costly repairs, and they will only get worse with time, so it is best to address them promptly. The sooner you act to repair them, the better. Look for signs like crackling or bubbling of your flooring surface, loose tiles, damp spots, or discolored spots and the musty smell of mildew.
While concrete is strong and is responsible for holding up everything from homes to enormous towers, it is still not invulnerable to the power of water. When excess moisture is left to build and linger within your concrete, the strength of your concrete becomes negative impacted, and it can lead to different problems. Here is how moisture causes three such problems…
While there will always be some moisture present in your concrete, there are ways to help control that moisture to keep any effects to a minimum. Here are some recommendations on what you can do inside your home to reduce concrete moisture in your foundation:
You can also take advantage of an exterior waterproofing measure to help keep outside moisture from your foundation concrete. All of these measures will not only help minimize the moisture in your concrete, but they will help increase the longevity of your foundation and prevent costly repairs that would be required from moisture-related damages.
Give us a call at (866) 485-6695 and we’ll have a specialist provide you with a free inspection and a zero-obligation price estimate!




We respect your privacy. By submitting, you authorize '58 Foundations and Waterproofing to reach you via call, email or text for information about your project needs. We will never share your personal information with third parties for marketing purposes. You can opt out at any time. Message/data rates may apply. Consent is not a condition of purchase. Privacy Policy